


500 byte flight simulator
18-05-2023Playable Demo
- Steer using the left/right arrows.
- Pitch up and down using the up/down arrows.
- The plane has momentum, when you pitch down you will gain speed quickly, when you pitch up you'll slow again.
The 500 bytes
Here is all of the code which makes that demo work:
x=0y=24405z=4a=.3g=0h=64v=.2q=127w=16p=poke2
p(y,0)☉=camera
for i=0,512 do
circfill(i%q,rnd(q),rnd(w),i%2)mset(i%w,i/w,i)
end
pal{2}spr(0,2,2,w,w)p(y,96)p(y-29,4112)::_::b=btn()g+=v*((b&2)/2-(b&1))>>9g*=.9a+=g
h+=(b&8)/8-(b&4)/4j=h/64-1z+=v*sin(j/4)v-=j/40s=sin(a)c=cos(a)x-=s*v
y-=c*v
k=z
cls(12)pal{7,6}for i=0,q do
if(i==h)pal{9,3}k-=w
p=k/(h-i)*32tline(0,i,q,i,x-p*c-p*s,y+p*s-p*c,p*c>>6,-p*s>>6)end
l=g*999☉(l-64,j*w-80)?"\b⬆️",14
line(w,l,-w,-l,8)?"¥",-2-l,j*9
☉()if(z>w)run()
flip()goto _
This is looking entirely illegible, so how did it get to this point?
The Vision
Since the 'tline' function had been added to Pico8, I have been wanting to create something that uses it's potential. This function allows drawing textured lines from the map data, with dramatically faster performance than you might expect from Pico8. Some of the most practical uses I have seen of this is for 2d sprite rotation, textured polygon drawing, and mode7-style plane rendering, for floors and roofs with a distinct 3d appearance. On hearing about the Tweet-Tweet Jam, a challenge to create a game in 500 characters of code, I took this as an opportunity to explore.
Making some noise
Before we can draw some 3d clouds or land, we need an image to draw. In my previous Pico8-projects I have created noise for terrain shapes or clouds via a number of methods, including placing random points and blurring them, placing points and bilinearly sampling between them, trig function based 'plasma', and more. All of these were far too large for the code size limitations, however, so I took an easy fallback: drawing plenty of randomly placed circles.
To improve the look of the final image to be drawn, I wanted to add a second color. This would become the light edge highlight on the clouds, and the sandy shores on the ground's islands. To achieve this, after drawing the circles, I then draw the whole spritesheet onto itself in a second colour, with a slight offset.
Using tline also requires that our data to be drawn exists in the map data, rather than just the sprite sheet, so with the following code we both draw our circles and put our sprites into the map data.
poke(0x5F55,0) -- Set the draw state to draw into the sprite sheet, rather than to the screen

-- Draw 1000 circles with a random size (0-16 pixels) and color (0 or 1)
for i=0,999 do
    circfill(rnd(128),rnd(128),rnd(16),rnd(2))
end

pal({2}) -- Change colour to create edge highlights
spr(0,2,2,16,16) -- Draw the whole spritesheet with an offset

-- Set the required map data
for i=0,256 do
    mset(i%16,i/16,i)
end

poke(0x5F55,0x60) -- Reset the draw state to draw into the screen instead of the spritesheet
poke2(0x5F38,0x1010) -- Set the tiling used by tline, so that the map repeats every 16 tiles
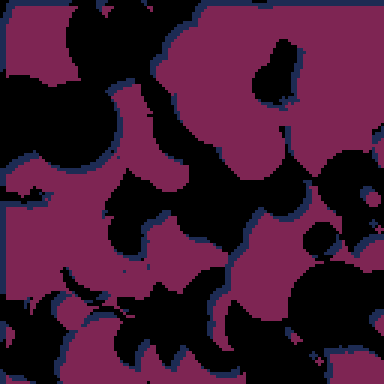
This creates this lovely generated image which the rest of the graphics rely on. This texture doesn't tile, but fixing that took up far too many bytes of code for me to worry about it. The colours we will pallette-swap into something more sensible later.
Some changes were made to this initial generation code to squeeze down it's size from what we see above, including:
- Moving into a single for loop, iterating 512 times (the maximum we can before the map pokes start hitting data we don't want it to).
- Changing some values and functions to shorter variable names (q=127 w=16 and y=24405).
- Creating a variable for poke2 (two of our pokes are single pokes, rather than poking two bytes, but we can save characters by using a variablised poke2 instead)
- Moving from hex values to decimal (eliminating the 0x prefix).
- Removing one set of brackets from the pal({2}) call, a trick which I heard from Pico8 expert @FSouchu on Twitter.
- Changing one call of rnd(q) to i%q and the colour randomisation to i%2 in the circle drawing, the visual difference of which is barely noticeable.
This leaves us with our final image creation code:
p(y,0)
for i=0,512 do
circfill(i%q,rnd(q),rnd(w),i%2)mset(i%w,i/w,i)
end
pal{2}spr(0,2,2,w,w)p(y,96)p(y-29,4112)
Diving into tline
The code which I started with for drawing clouds is below:
--[[ Variables
s: the scale of the clouds
a: the rotation of the view (about the vertical axis)
h: the horizon line
x,y,z: the position of the view
]]--

cls(12) -- Fill the screen with blue
pal({7,6}) -- Palette swap our blue and maroon texture to more appropriate cloud colours
for i=0,h do -- Draw tlines from the top of the screen to the horizon line
    p=z/(h-i)
    sap,cap=sin(a)*p*s,cos(a)*p*s

    -- The coords of the left and right points at the screen edges
    lx=(-cap-sap)+x
    ly=(sap-cap)+y
    rx=(cap-sap)+x
    ry=(-sap-cap)+y

    -- The gradient of the tline in map space
    dx=(rx-lx)/128
    dy=(ry-ly)/128

    -- Draw the line across the width of the screen
    tline(0,i,127,i,lx,ly,dx,dy)
end
pal() -- Reset the draw palette
Initially I looped through this twice, once to draw the clouds and a second time to draw the ground, but as I played around with the movement, I realised something interesting. If you kept drawing past the horizon line, the view would "flip", as p became negative. This would flip the drawing of the lines, effectively creating a second plane of clouds below the first. The issue was, as the player's z coordinate changed both planes would appear to approach or recede together, braking the illusion of moving between two planes. This can be seen in this gif:
By subtracting a value from the player's z coordinate at the drawing point of the horizon line, it was possible to have the planes appear to recede or approach together. Combined with a pallette swap at the horizon line, both the clouds and land can be drawn very simply and with a very low character count:
The illusion still breaks entirely if the player leaves the vertical boundaries of the world, seen in the gif below, but in the final game this was avoided by first making sure the player never has enough momentum to fly above the cloudline, and second by causing them to crash and restart if they would go below the ground plane.
From here a lot of the above drawing logic can be squeezed down and simplified with just algebra which, combined with some of the code-shrinking techniques described above, results in the following code for drawing the environment:
s=sin(a)c=cos(a)k=z
cls(12)pal{7,6}for i=0,q do
if(i==h)pal{9,3}k-=w
p=k/(h-i)*32tline(0,i,q,i,x-p*c-p*s,y+p*s-p*c,p*c>>6,-p*s>>6)end
Starting Soaring
The clear next step is giving the player an interesting way to traverse this environment; it's meant to be a game after all. I liked the idea of gliding mechanics, as flying seemed like the best way to provide vertical mobility, showing off the best parts of the environment rendering. I also personally thought it would be more interesting than powered plane flight.
My original vision for the game was to be first-person, as while I thought it would be better as a third-person game, I was skeptical I would have code space left to draw a character. This turned out to be wrong as I continued to squeeze down the character count, which I am very pleased about. A side effect of this is that the controls actually work as though it's a first person game, with the view rotating about the camera, effectively also moving the player also, rather than it rotating about the player. This saves on characters and isn't noticeable in the final product unless you look for it.
The expanded movement logic is as follows:
--[[ Variables
a: the rotation of the view (about the vertical axis)
g: the rate of change of a
h: the horizon line (effectively the pitch of the player's view)
v: the player's current speed
x,y,z: the position of the player
]]--

-- The x axis of player input
ix=0
if (btn(0)) ix-=1
if (btn(1)) ix+=1

-- The y axis of player input
iy=0
if (btn(2)) iy-=1
if (btn(3)) iy+=1

-- Update the rotation of the view based on the x-input and current speed
g+=v*ix/512
g*=.9
a+=g

-- Update the pitch/horizon line based on the y-input
h+=iy

-- Update the z position based on the current pitch and speed
j=h/64-1
z+=v*sin(j/4)

-- Update the speed based on the current pitch
v-=j/40

-- Update the player's position based on the current angle and speed
s=sin(a)c=cos(a)
x-=s*v
y-=c*v
There many issues with this flight model, but I think it found a good balance between how good it feels to fly, code size, and some semblance of realism. There wasn't a tonne that could be done here to compress the code size, but the biggest saving was the change from using btn() and if statements to get the player input, to instead use a single btn() call, returning a bitfield of inputs, and bitwise operations. With this, and the removal of a lot of whitespace, the final compressed code became:
b=btn()g+=v*((b&2)/2-(b&1))>>9g*=.9a+=g
h+=(b&8)/8-(b&4)/4j=h/64-1z+=v*sin(j/4)v-=j/40s=sin(a)c=cos(a)x-=s*v
y-=c*v
k=z
Drawing a plane
It was a very pleasant surprise when I realised that I would have space to include a plane, as I think it significantly improved both the look and feel of the game, even when it came at the cost of some other features like a properly tiling texture. The plane went through many iterations of visuals, with the earliest version, close to the final product, as follows:
xd=64-g*999 -- the x-coord to draw the plane at
yd=80-j*w -- the y-coord to draw the plane at

--x and y offset for the plane's wing tips based on the player's current rate of turning
l=w*cos(g*w)
k=w*sin(g*w)

-- drawing the wings
line(xd+l,yd-k,xd-l,yd+k,8)
line(xd+l,yd-k-1,xd-l,yd+k-1,14)

-- drawing the main cabin
print("⬆️",xd-3,yd-3,14)

--drawing the tail
line(xd,yd,xd-g*500,yd+j*5+4,14)
print("¥",xd-1-g*500,yd+j*5,8)
Which resulted in quite a nice looking plane effect:
Quite a lot of changes were required, however, to get this to fit into a smaller size, including:
- Removing one of the plane's wing lines (this was a significant cost to the visuals sadly, but saved a good lot of tokens).
- Changing the logic for drawing the plane's wing to remove the use of sin and cos. This means that the length of the wing now changes with the angle it's drawn at but I don't think it matters significantly.
- Removing the plane's tail line (which was not particularly noticeable anyway).
- Removing the variables for the position of the plane on-screen, and instead using a call to the camera function so objects could be drawn at 0,0.
- Changing print functions to use the '?' syntax
- Removing the colour parameter from many of the drawing functions, as pico8 will draw objects in the last used colour if one isn't specified.
- Using the control code "\b" to position the body of the plane, instead of coordinates
All of these changes allowed for huge code compression when drawing the plane:
☉=camera
l=g*999☉(l-64,j*w-80)?"\b⬆️",14
line(w,l,-w,-l,8)?"¥",-2-l,j*9
☉()
Final Touches
The last little bits of code in this demo are the main loop, which uses the classic Pico8 trick of goto and labels to replace an update function, and the game reset, done with a check to see if the player has hit the ground.
if(z>w)run()
Previously I also included a reset if the player was flying backwards (v<0), representing a restart due to stalling, but it consumed a few valuable characters.
If you got here, thanks for reading! All in all this jam was a fantastic opportunity to explore tiny sized code where every character counts, and I would highly recommend trying out a similar jam if you haven't!